WinRM 证书认证
WinRM 的证书验证,是一种使用 X.509 证书,而非用户名和密码,验证 Windows 主机的方法。
与基于 SSH 密钥的身份验证相比,证书身份验证确实有些缺点,比如:
- 其只能映射到某个本地 Windows 用户,不能映射到域账户;
- 用户名和密码必须映射到证书上,如果密码更改,则该证书就需要重新映射;
- Windows 主机上的管理员可经由证书映射,检索该名本地用户的密码;
- Ansible 无法使用加密的私钥,因此必须在未加密的情况下存储私钥;
- Ansible 无法使用存储为变量的证书及私钥,他们必须是个文件;
Ansible 的配置
证书身份验证使用证书作为密钥,类似于 SSH 密钥对。公钥和私钥存储在 Ansible 控制节点上,用于身份验证。下面的示例显示了配置用于证书身份验证的一些主机变量:
# psrp
ansible_connection: psrp
ansible_psrp_auth: certificate
ansible_psrp_certificate_pem: /path/to/certificate/public_key.pem
ansible_psrp_certificate_key_pem: /path/to/certificate/private_key.pem

# winrm
ansible_connection: winrm
ansible_winrm_transport: certificate
ansible_winrm_cert_pem: /path/to/certificate/public_key.pem
ansible_winrm_cert_key_pem: /path/to/certificate/private_key.pem
默认情况下 Windows 主机上的证书验证未被启用,但可以通过在 PowerShell 中运行以下命令启用:
Set-Item -Path WSMan:\localhost\Service\Auth\Certificate -Value $true
由于 Ansible 所使用的 Python 底层库的限制,其中的私钥无法加密。
注意:要启用 TLS 1.3 连接下的证书验证,需要 Python 3.8+、3.7.1 或 3.6.7 版本,以及 Python 的软件包
urllib3>=2.0.7,或更新版本。
证书生成
使用证书验证的第一步,是要生成一张证书及私钥。证书生成必需带有以下属性:
Extended Key Usage必须包含clientAuth (1.3.6.1.5.5.7.3.2);Subject Alternative Name必须包含userPrincipalName (1.3.6.1.4.1.311.20.2.3)的otherName条目。
userPrincipalName 的值可以是任何值,但在这个指南中,我们将使用值 $USERNAME@localhost,其中 $USERNAME 是该证书将映射到的用户名字。
此操作可通过多种方式完成,诸如 OpenSSL、PowerShell 或 Active Directory 证书服务。下面的示例展示了如何使用 OpenSSL 生成一张证书:
#!/usr/bin/env bash
# Set the username to the name of the user the certificate will be mapped to
USERNAME="local-user"

cat > openssl.conf << EOL
distinguished_name = req_distinguished_name

[req_distinguished_name]
[v3_req_client]
extendedKeyUsage = clientAuth
subjectAltName = otherName:1.3.6.1.4.1.311.20.2.3;UTF8:${USERNAME}@localhost
EOL

openssl req \
    -new \
    -sha256 \
    -subj "/CN=${USERNAME}" \
    -newkey rsa:2048 \
    -nodes \
    -keyout cert.key \
    -out cert.csr \
    -config openssl.conf \
    -reqexts v3_req_client

openssl x509 \
    -req \
    -in cert.csr \
    -sha256 \
    -out cert.pem \
    -days 365 \
    -extfile openssl.conf \
    -extensions v3_req_client \
    -key cert.key

rm openssl.conf cert.csr
以下示例展示了如何使用 PowerShell 生成一张证书:
# Set the username to the name of the user the certificate will be mapped to
$username = 'local-user'

$clientParams = @{
    CertStoreLocation = 'Cert:\CurrentUser\My'
    NotAfter          = (Get-Date).AddYears(1)
    Provider          = 'Microsoft Software Key Storage Provider'
    Subject           = "CN=$username"
    TextExtension     = @("2.5.29.37={text}1.3.6.1.5.5.7.3.2","2.5.29.17={text}upn=$username@localhost")
    Type              = 'Custom'
}
$cert = New-SelfSignedCertificate @clientParams
$certKeyName = [System.Security.Cryptography.X509Certificates.RSACertificateExtensions]::GetRSAPrivateKey(
    $cert).Key.UniqueName

# Exports the public cert.pem and key cert.pfx
Set-Content -Path "cert.pem" -Value @(
    "-----BEGIN CERTIFICATE-----"
    [Convert]::ToBase64String($cert.RawData) -replace ".{64}", "$&`n"
    "-----END CERTIFICATE-----"
)
$certPfxBytes = $cert.Export('Pfx', '')
[System.IO.File]::WriteAllBytes("$pwd\cert.pfx", $certPfxBytes)

# Removes the private key and cert from the store after exporting
$keyPath = [System.IO.Path]::Combine($env:AppData, 'Microsoft', 'Crypto', 'Keys', $certKeyName)
Remove-Item -LiteralPath "Cert:\CurrentUser\My\$($cert.Thumbprint)" -Force
Remove-Item -LiteralPath $keyPath -Force
由于 PowerShell 无法生成 PKCS8 PEM 的私钥,因此我们需要使用 OpenSSL,将该 cert.pfx 文件转换为一个 PEM 私钥:
openssl pkcs12 \
    -in cert.pfx \
    -nocerts \
    -nodes \
    -passin pass: |
    sed -ne '/-BEGIN PRIVATE KEY-/,/-END PRIVATE KEY-/p' > cert.key
其中 cert.pem 为公钥,cert.key 为明文的私钥。这两个文件必须能被 Ansible 控制节点访问,以用作身份验证。私钥则无需存在于 Windows 节点上。
Windows 的配置
一旦公钥和私钥生成,我们就需要在 Windows 主机上导入并信任公钥,及配置用户映射。Windows 主机无需访问私钥,只需能访问公钥 cert.pem 以配置证书验证。
导入证书到证书存储
要让 Windows 信任该证书,就必须将其导入 LocalMachine\TrustedPeople 证书存储区。咱们可通过运行以下脚本完成这一操作:
{{#import import_cert.ps1}}
如果该证书是自签名的,或由某个主机不信任的 CA 签发,则咱们需要将该 CA 证书,导入受信任的根存储。由于我们的示例使用了一张自签名证书,因此我们将把该证书,作为一个受信任 CA 导入,但在生产环境中,我们将导入签发该证书的 CA。
$store = Get-Item -LiteralPath Cert:\LocalMachine\Root
$store.Open('ReadWrite')
$store.Add($cert)
$store.Dispose()
将证书映射到某名本地用户
一旦该证书已导入 LocalMachine\TrustedPeople 存储,WinRM 服务就可以创建该证书与某个本地账户之间的映射。这通过运行以下 PowerShell 脚本完成:
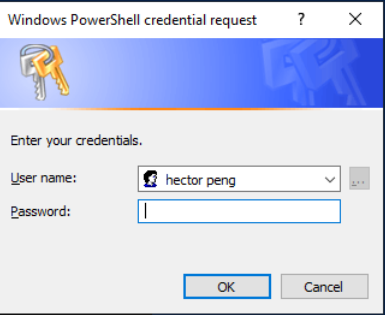
# Will prompt for the password of the user.
param ($username)
$credential = Get-Credential "$username"

$cert = [System.Security.Cryptography.X509Certificates.X509Certificate2]::new("$HOME\cert.pem")
$certChain = [System.Security.Cryptography.X509Certificates.X509Chain]::new()
[void]$certChain.Build($cert)
$caThumbprint = $certChain.ChainElements.Certificate[-1].Thumbprint

$certMapping = @{
    Path       = 'WSMan:\localhost\ClientCertificate'
    Subject    = $cert.GetNameInfo('UpnName', $false)
    Issuer     = $caThumbprint
    Credential = $credential
    Force      = $true
}
New-Item @certMapping
其中 Subject 是证书 SAN 条目 1 中 userPrincipalName 的值。Issuer 是签发咱们证书的 CA 证书指纹。Credential 是我们要将证书映射到的本地用户的用户名与密码。
译注:
- 证书 SAN 条目,the certificate SAN entry,Subject Alternative Name 证书是一种特殊的 SSL/TLS 证书,允许在一个证书下保护多个主机名或域名。
参考:The Essential Guide to SAN Certificates
- 经测试,原文中:
$cert = [System.Security.Cryptography.X509Certificates.X509Certificate2]::new("cert.pem")
应写作:
$cert = [System.Security.Cryptography.X509Certificates.X509Certificate2]::new("$HOME\cert.pem")
否则会报出
Execption calling ".ctor" with "1" argument(s): "The system cannot find the path specified."错误。且由于脚本中的Get-Credential "$username",而会弹出一个要求输入该账号密码的交互式弹窗,因此需要在 Windows 主机上手动运行。
以
map_cert_and_user.ps1 -username administrator运行该 PowerShell 脚本成功后的输出如下:
> .\map_cert_and_user.ps1 -username administrator


   WSManConfig: Microsoft.WSMan.Management\WSMan::localhost\ClientCertificate

Type            Keys                                Name
----            ----                                ----
Container       {URI=*, Issuer=388697C2DDD757812... ClientCertificate_9346497
使用 Ansible
下面的 Ansible playbook 可用于创建一名本地用户并映射所提供的证书,以用于证书身份验证。其需要以调用分别设置要创建的用户名及所生成公钥 PEM 文件路径的 username 和 cert_pem 变量调用。这个 playbook 期望 cert_pem 为自签名证书,若使用的是由某个 CA 签发的证书,咱们将必须对其进行编辑,以便将其复制并导入 LocalMachine\Root 存储空间。
- name: Setup WinRM Client Cert Authentication
  hosts: windows
  gather_facts: false

  tasks:
  - name: Verify required facts are setup
    ansible.builtin.assert:
      that:
      - cert_pem is defined
      - username is defined

  - name: Check that the required files are present
    ansible.builtin.stat:
      path: '{{ cert_pem }}'
    delegate_to: localhost
    run_once: true
    register: local_cert_stat

  - name: Fail if cert PEM is not present
    ansible.builtin.assert:
    that:
    - local_cert_stat.stat.exists

  - name: Generate local user password
    ansible.builtin.set_fact:
      user_password: "{{ lookup('ansible.builtin.password', playbook_dir ~ '/user_password', length=15) }}"

  - name: Create local user
    ansible.windows.win_user:
      name: '{{ username }}'
      groups:
      - Administrators
      - Users
      update_password: always
      password: '{{ user_password }}'
      user_cannot_change_password: true
      password_never_expires: true

  - name: Copy across client certificate
    ansible.windows.win_copy:
      src: '{{ cert_pem }}'
      dest: C:\Windows\TEMP\cert.pem

  - name: Import client certificate
    ansible.windows.win_certificate_store:
      path: C:\Windows\TEMP\cert.pem
      state: present
      store_location: LocalMachine
      store_name: '{{ item }}'
    register: client_cert_info
    loop:
    - Root
    - TrustedPeople

  - name: Enable WinRM Certificate auth
    ansible.windows.win_powershell:
      script: |
        $ErrorActionPreference = 'Stop'
        $Ansible.Changed = $false

        $authPath = 'WSMan:\localhost\Service\Auth\Certificate'
        if ((Get-Item -LiteralPath $authPath).Value -ne 'true') {
            Set-Item -LiteralPath $authPath -Value true
            $Ansible.Changed = $true
        }

  - name: Setup Client Certificate Mapping
    ansible.windows.win_powershell:
      parameters:
        Thumbprint: '{{ client_cert_info.results[0].thumbprints[0] }}'
      sensitive_parameters:
      - name: Credential
        username: '{{ username }}'
        password: '{{ user_password }}'
      script: |
        param(
            [Parameter(Mandatory)]
            [PSCredential]
            $Credential,

            [Parameter(Mandatory)]
            [string]
            $Thumbprint
        )

        $ErrorActionPreference = 'Stop'
        $Ansible.Changed = $false

        $userCert = Get-Item -LiteralPath "Cert:\LocalMachine\TrustedPeople\$Thumbprint"
        $subject = $userCert.GetNameInfo('UpnName', $false)  # SAN userPrincipalName

        $certChain = New-Object -TypeName Security.Cryptography.X509Certificates.X509Chain
        [void]$certChain.Build($userCert)
        $caThumbprint = $certChain.ChainElements.Certificate[-1].Thumbprint

        $mappings = Get-ChildItem -LiteralPath WSMan:\localhost\ClientCertificate |
            Where-Object {
                $mapping = $_ | Get-Item
                "Subject=$subject" -in $mapping.Keys
            }

        if ($mappings -and "issuer=$($caThumbprint)" -notin $mappings.Keys) {
            $null = $mappings | Remove-Item -Force -Recurse
            $mappings = $null
            $Ansible.Changed = $true
        }

        if (-not $mappings) {
            $certMapping = @{
                Path = 'WSMan:\localhost\ClientCertificate'
                Subject = $subject
                Issuer = $caThumbprint
                Credential = $Credential
                Force = $true
            }
            $null = New-Item @certMapping
            $Ansible.Changed = $true
        }
(End)